On the journey toward eating more healthy, real food, I've read a lot of references lately to soaking beans, nuts and grains. I've skipped over a lot of it because it sounded too complicated. Well it's not. This post from Modern Alternative Mama today and several recent discussions with my wife was enough to make me take the plunge. It's really quite simple - soak in salt water, then dry in a dehydrator. This reduces the phytic acid which inhibits digestion and absorption of nutrients. Here's a list of soaking and sprouting times for common nuts and grains.
Thursday, December 1, 2011
Monday, November 28, 2011
Hillbilly Cream Separator & Making Butter
I've been working for a few months on a way to separate cream without buying an expensive gadget. I read that it is easier to drain the milk off the bottom than to try to skim the cream off the top, and after one failed attempt at buying a second-hand glass jug with a spigot at Goodwill, I decided to go very low-tech:
After several tries where I ended up spraying milk all over the place,
the trick seems to be to stab, twist and pull the knife out in one fluid motion:
If you look close you can see the line where the cream has separated from the milk after sitting in the fridge for a day:
Today I decided to put the cream right in the mixer and make butter:
Monday, November 14, 2011
Another chicken coop project
The heat lamp will have to wait for another day. Today I decided to install a wood floor in the chicken coop. The old floor of limestone rocks was getting to be too much of a hassle because the girls would scratch around in their pine shaving bedding and then get bored and start digging through the rocks (notice the mini crater).
I dug through my pile of scrap wood and found that I didn't have any pieces of plywood big enough to cover the entire floor. I guess I'll just have to make do and cover it with several smaller pieces. First I cut several pieces of 4x4s and 2x4s to act as floor joists:
Then I pieced together the flooring:
Fresh pine shavings:
Penny comes inside to check it out!
I dug through my pile of scrap wood and found that I didn't have any pieces of plywood big enough to cover the entire floor. I guess I'll just have to make do and cover it with several smaller pieces. First I cut several pieces of 4x4s and 2x4s to act as floor joists:
Fresh pine shavings:
Penny comes inside to check it out!
I hope this will make cleanup easier and not harder.
Thanks for stopping by today!
John
Sunday, November 13, 2011
Chicken Lighting Update
Here's a long overdue update on the chicken lighting setup. Our hens now have artificial light in the evening instead of the morning. (The 4:30am wake-up call was encouraging too much noise when neighbors were likely still sleeping.)
As Anna Hess of the Walden Effect suggested they would in her comment to my original post - the girls usually hop up on the roost before it's actually time for 'lights out' so there has been no problem just popping in and turning off the light at their appointed bedtime (8:30ish).
The next project for the chicken coop? I'm thinking about maybe installing a heat lamp for winter, even if our Buff Orpingtons are already winter-tolerant with their mass of fluffy feathers.
The next project for the chicken coop? I'm thinking about maybe installing a heat lamp for winter, even if our Buff Orpingtons are already winter-tolerant with their mass of fluffy feathers.
Wednesday, November 2, 2011
Frost + green tomato harvest
Our first killing frost happened a few days ago. I was mostly ready except for a bunch of green tomatoes.
Tomato harvest ready to cook down into sauce:
Tuesday, November 1, 2011
E-Book review - Weekend Homesteader
As I've delved into the blogging world over the last couple of weeks, one of the sites I read regularly is the Walden Effect, by Anna and Mark Hess. In addition to regular blog updates about life on their homestead in Virginia, Anna writes a monthly ebook called the Weekend Homesteader. I got my hands on a copy of the November edition and found some very useful information. Anna has articles about garden rotation, storing water, how to cook a whole chicken, and the one I found most thought-provoking, diversifying your income.
Anna and Mark make their living selling a poop-free chicken waterer that Mark invented called the Avian Aqua Miser.
I've always been an entrepreneurial sort, but as Anna points out, you have to be careful that your brilliant idea doesn't end up being just a hobby if it only pays you mere pennies per hour for your time. Anna and Mark have sold eggs, honey and grapes off their farm, and ended up making less than minimum wage for their effort.
There are two things that Anna says has made the chicken waterer business a success: selling a niche product and cheap internet marketing to an international audience.
Both of those principles are food for thought for me. I have a side business right now selling refurbished laptops on Amazon. I am taking advantage of the second principle, but my product is not very niche - I have a lot of competition.
You can get your copy of the Weekend Homesteader for only 99 cents on Amazon.com, or check the Walden Effect, as Anna posts many of the articles throughout the month.
Thanks for visiting!
John
Painting the Chicken Coop
Saturday, October 29, 2011
Chicken lighting
It's time for a new lighting strategy for our chickens. Penny was cackling loudly this morning at 6am - I think she just laid an egg.
I have a light in the coop, which I turn on each morning at 4:30am (the time I leave for work). This extends their 'daylight' to about 14 hours. Unfortunately I don't think our neighbors will appreciate a chicken making noises while it's still dark outside.
Everything I've read says to add lighting in the morning instead of the evening, but this seems to be primarily so that the hens won't be suddenly in the dark at night and unable to find their roost. With 2 chickens, I think I will be able to set them up on the roost myself and then turn off the light for them. If this will keep down the noise and make us better neighbors, it'll be well worth it. I'm going to transition them from morning lighting to evening lighting - dusk to 9pm.
Do you use artificial light for your chickens?
This week I finished my attempt at 2 cold frames / mini-greenhouses. We'll see if I can put them to good use. I picked up 20 free windows on craiglist, put them together with deck screws, and added a 49 cent hinge set from Marc's!
Those 3 black trays have freshly planted lettuce in the them. Is there any chance I can grow a crop of lettuce since it's already the end of October in northeast Ohio? I don't know, but I'm going to try. Maybe if I put a blanket over the greenhouse on the really cold nights?
Jonathan showing off the other completed cold frame with a strawberry plant pot and basil inside:
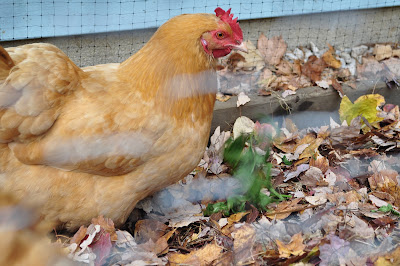
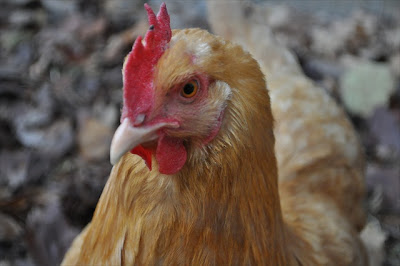
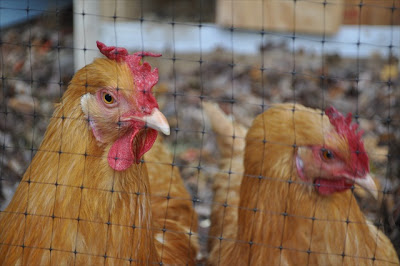
I took a few pictures of the chickens while I was at it. Fresh leaves were added to the run and the old wet ones were taken to the compost pile today:
Thanks for visiting!
John
Wednesday, October 26, 2011
Making Applesauce
There are probably as many ways to make applesauce as there are varieties of apples - but here's how I did it this week.
The apples: Cortlands from Hillcrest Orchard in Walnut Creek. They are similar to McIntosh but sweeter.
The equipment: In the tradition of Lindsay's grandparents, Ann and Merle Brown, I used a cone-shaped ricer. We bought this at the Berlin Antique Mall but you can also buy them new, like this one on Amazon.
First I washed the apples, then I used a corer/slicer, and then I put them in a big stockpot.
After cooking the apples until soft, it was time to use the ricer!
The finished product went in freezer bags and into the freezer.
Friday, October 21, 2011
Welcome!
Thanks for checking out my blog!
I've decided to do this for two main reasons - as a personal journal of the projects I undertake, and to hopefully make connections with others who love real organic food and are interested in making and growing more of their own.
There is always something new to learn and I would love to hear your comments and suggestions!
John
Thursday, October 20, 2011
Our Hens
Lindsay wrote this post for her paper-crafting blog and has kindly let me re-post to start off the new blog:
John and I decided to add a couple more chickens to our flock, and found a lady who wanted to downsize hers! Perfect! Well, maybe not. We got two younger Buff Orpington chickens that lay and are very domesticated. They didn't stand a chance against Gretchen and Sassy! We tried to integrate the new girls slowly but the other two just wouldn't have it. So, we parted ways with them. I know it sounds cruel, but a nice woman answered our ad to take them and they are enjoying the wide open space on her farm. We now have two gorgeous, happy chickens who have been busy giving us the most delicious eggs!
Along with their arrival, my so handy hubby got busy revamping their coop! Love what he did with such little supplies! All that is left to do is give it a coat of paint, yellow with white trim! Can't wait! Here is the new coop along with our two new birds...
Meet Sugar. My favorite, I might add. She is super friendly and doesn't mind being picked up. She also loves to chat with you when you are near.
Meet Penny. She is very young and hyper, loves to dig and is really busy!
Here is the coop that John rebuilt. You can check out the original design here. We had to make do with the size constraints given by our city laws, but found there is plenty of space for these two. Don't mind the leafy mess! Time to clean!
Some pics of the inside, which include, a dirt mix of ash, sand and dirt for cleaning themselves (keeps the bugs off). A roost for sleeping, a nesting box for laying eggs along with feed and water.
Of course I had to leave you with a couple more pics of the girls.
Thank you so much for humoring me! I just love having chickens and sharing about them with others! Some people may think it strange, but I have found caring for and watching these two to be so relaxing and gratifying. Not to mention, delicious! There is nothing like a fresh egg or two to make it extra worth while.
Subscribe to:
Comments (Atom)


